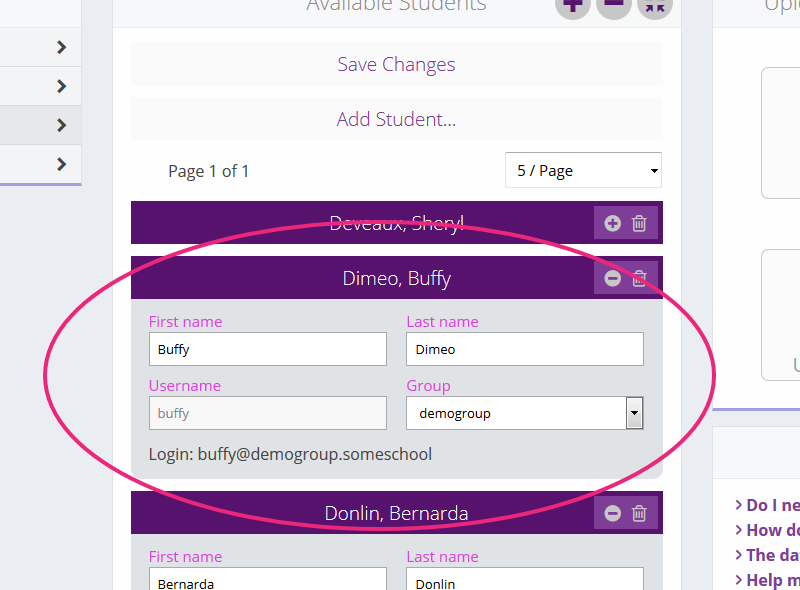
Our new teacher portal allows parents and teachers to monitor progress and performance as your students use our apps. However, before any data can be gathered, teachers must create the student usernames and initial game settings. This first step on how to create a class roster is outlined in the previous post.
Setting up the games is a simple process. Usually, a teacher will set up all the students at one time using the Bulk Actions option. Teachers then differentiate student settings by clicking on the individual’s settings name.
In any case, to create and edit settings for the students:
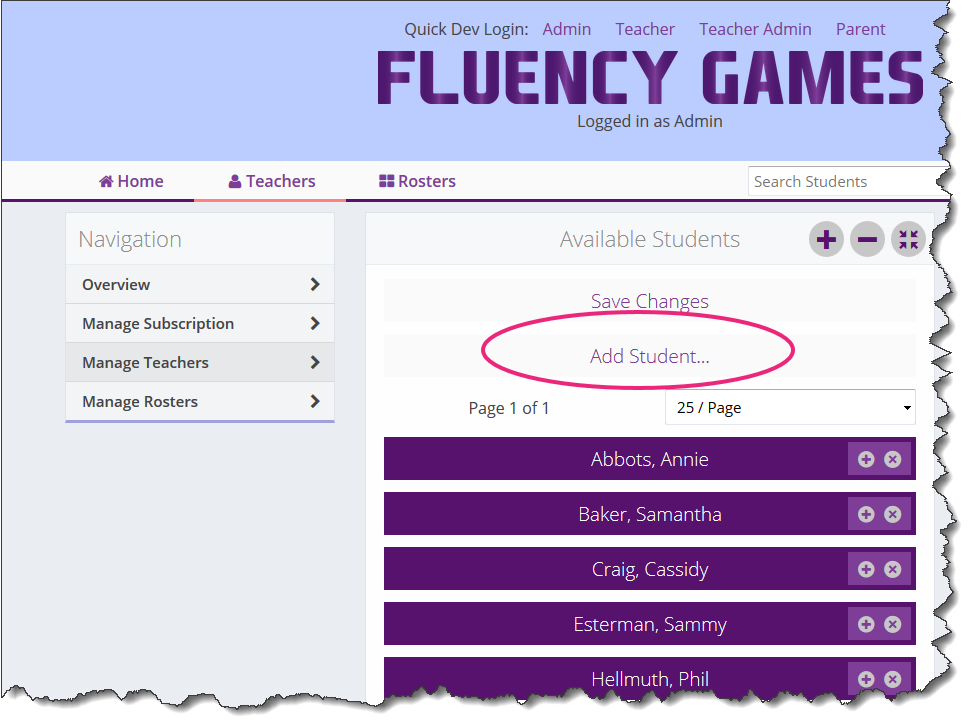
- lick ‘Manage Students‘ on the left hand menu .f you are not currently on the manage students page.
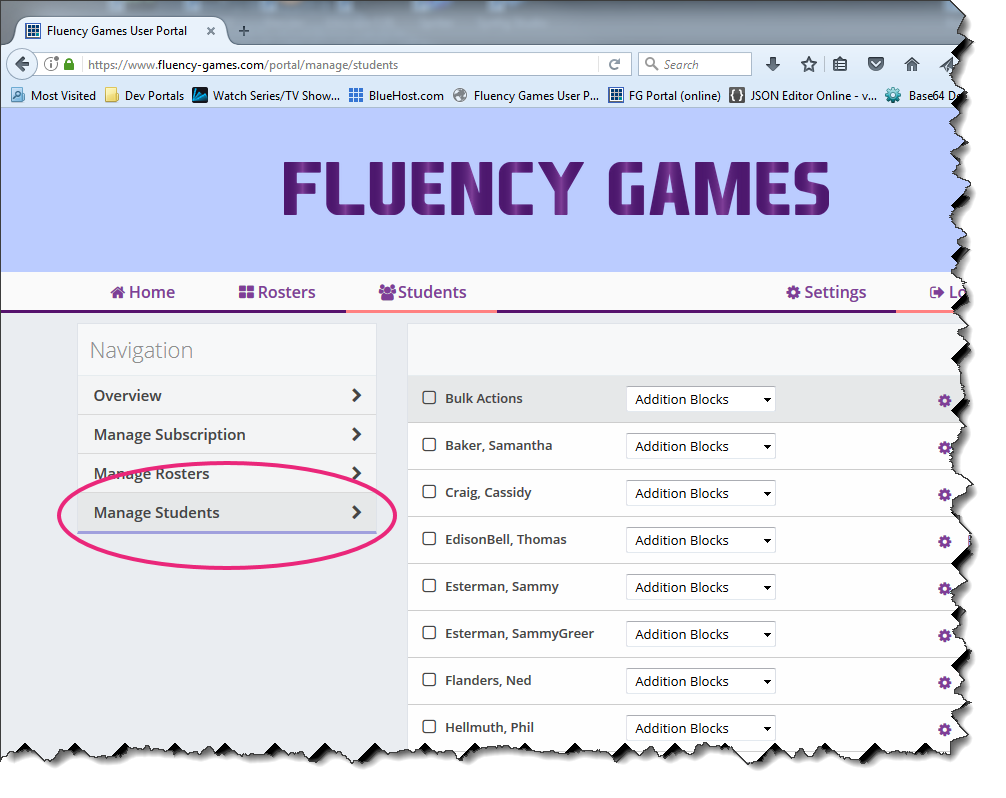
- Verify the product you will be using by clicking on the drop down box from the Bulk Actions row.
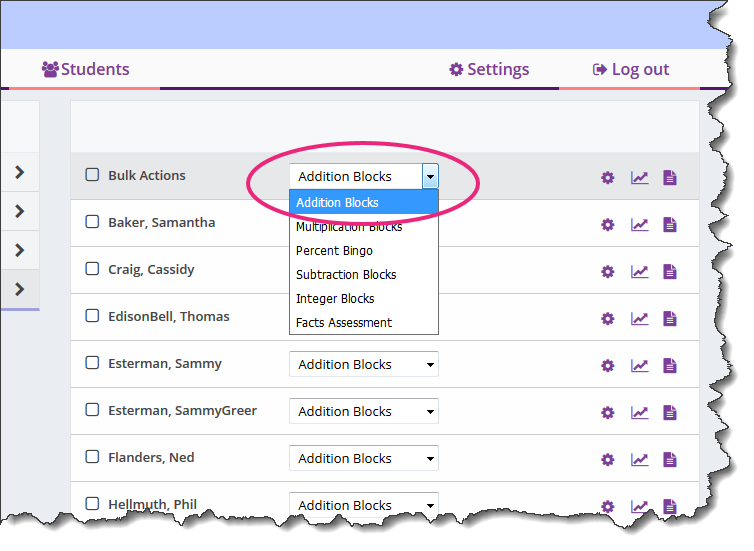
- Create game settings for all selected students by clicking the Bulk Actions check box, then click the Settings icon.
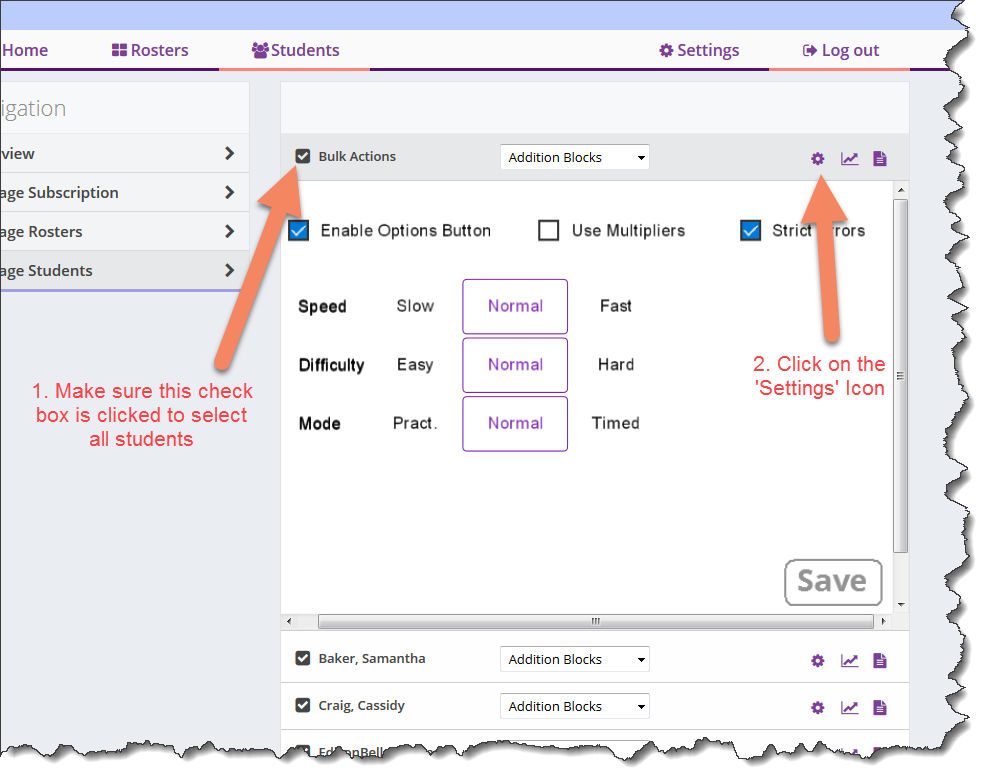
The App-specific settings will be displayed. Change the Speed, Difficulty, Game Mode, and any other options that your students will be primarily using.
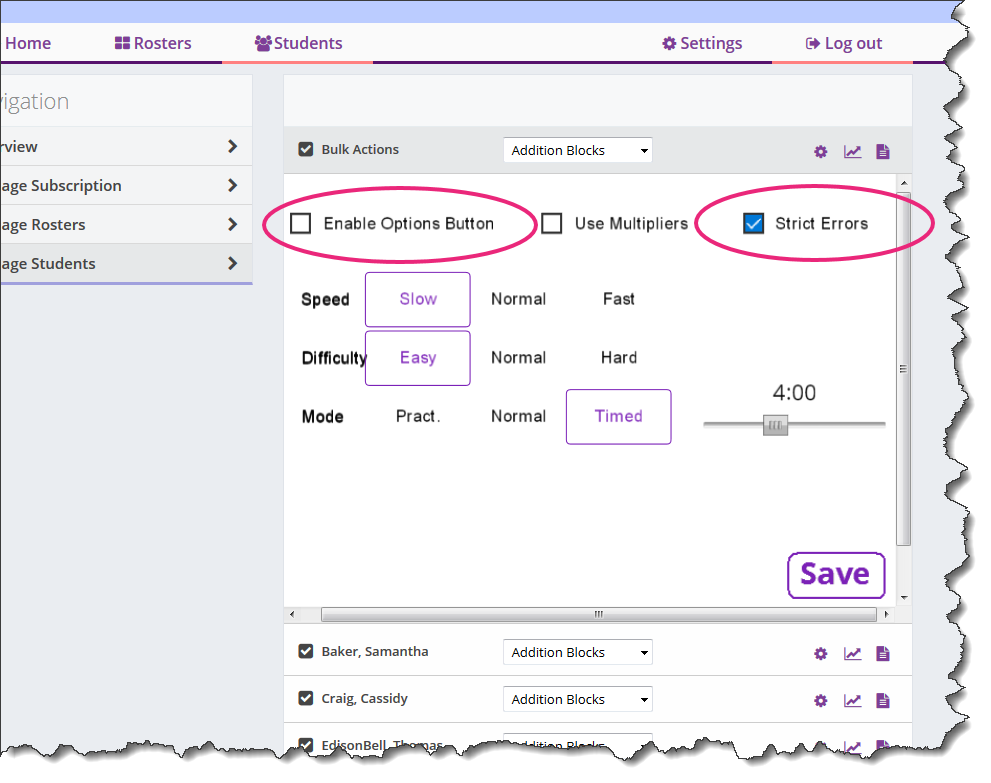
Note: Each of our games also allow teachers to disable changing the options from within the app (only when a student logs into the game). Click the Enable Options Button check box off to prevent your students from changing the game options.
Additionally, the Strict Errors check box determines how errors while be recorded. Strict Errors means that each time the player makes a mistake, a separate attempts and error is recorded. This will allow the teacher to view how many times a player attempts an answer.
Turning Strict Errors OFF means that only one attempt and one error will be recorded, now matter how may times the player attempts to answer. This gives a more concrete success-or-failure accuracy score.
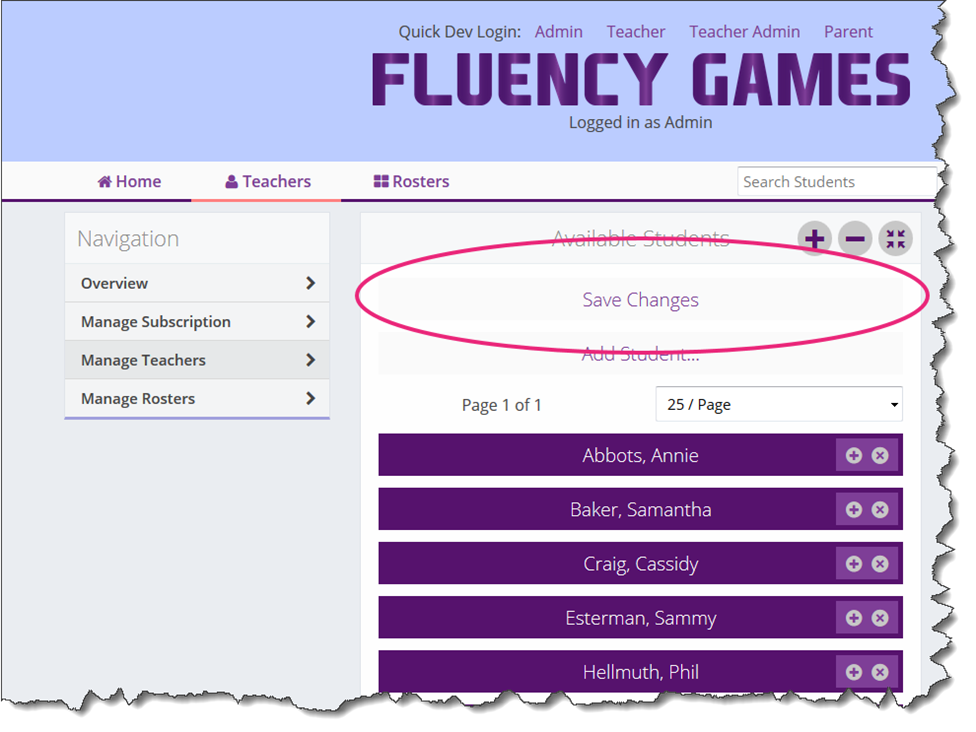
- Finally, click Save when done. The site will create/update settings for all students in that are currently on the class roster.

Click on an individual student’s settings icon to differentiate speed, difficulty, or mode options, as needed.
Now, when your students log in to the game (on any device) the options for that game is automatically loaded.
The next post will cover the data and progress reporting.